Building a Neon EVM plugin for ElizaOS: A Developer's Tutorial
ChatGPT changed how we interact with information. Assistants like Alexa and Siri made our lives easier with just a voice command. As the internet evolves, crypto needs the same shift: intuitive experiences that lower barriers for everyone.
Solana proved that better UX wins. AI agents are the next step: autonomous programs that process data, adapt, and execute tasks with minimal human input. Imagine an AI that moves USDC to the best yield farm, sends tokens for rent every month, or analyzes DAO proposals - all without manual intervention.
Today, we'll guide you through building a Neon EVM plugin for ElizaOS, helping devs integrate AI-driven automation into dApps deployed on Solana via Neon EVM.
Why ElizaOS on Neon EVM?
Ai16z’s ElizaOS is a TypeScript-based multi-agent AI framework that enables developers to create autonomous AI agents for DeFi applications. It supports:
- Multi-Agent architecture: Deploy and manage multiple unique AI personalities simultaneously;
- Character system: Create diverse agents using the characterfile framework;
- Platform integration: Seamless connectivity with Discord, Twitter, and other platforms.
Neon EVM is Solana’s network extension that brings Ethereum dApps to Solana. It allows EVM smart contracts to run on Solana’s high-performance network while preserving EVM compatibility.
Our plugin will act as a bridge, enabling ElizaOS to execute EVM transactions on Neon. We will use token transfers as an example, but the same approach can be applied to automate a variety of on-chain actions.
This serves as a first step: Neon’s EVM-Solana interoperability allows developers to expand AI agent capabilities on Solana, unlocking:
- High-Throughput AI Automation: Use Solana’s speed for frictionless, near-instant transactions.
- Ethereum Compatibility: Keep your favorite Ethereum tools and libraries.
- Seamless UX: Chat with a “character” that can do more than talk—it can move tokens, invest, or even vote on-chain.
All while tapping into Solana’s unified liquidity and user base.
Let’s get started!
Building a Neon EVM Plugin for Eliza
In this tutorial, we will go through the steps to implement a plugin action that allows the transfer of the ERC-20 NEON token on Neon EVM. If you have NEON as SPL tokens on Solana, please use NeonPass to receive the ERC-20 version.
Note: ElizaOS is still under active development. The exact steps and APIs might change. This section provides a conceptual outline and illustrative code snippets to guide you. You'll need to adapt these to the specific ElizaOS and Neon EVM versions you are working with.
Prerequisites
- Node.js 23 or higher
- pnpm package manager
- TypeScript knowledge
- API keys for the search service you want to implement: - RPC link for Neon EVM https://chainlist.org/chain/245022926
Step 1: Clone the Starter Repository
Clone the template repository and install dependencies.
git clone https://github.com/tmc/eliza-plugin-starter
cd eliza-plugin-starter
pnpm install
Step 2: Open the Project in Your Code Editor
Open up the eliza-starter code in your code editor and ensure that you are in the right directory
cd eliza-starter
Step 3: Install Dependencies and Configure Environment Variables
Run the following command to install all necessary packages.
pnpm i
Duplicate the example env file template
cp .env.example .env
And now here you will have to add in env variables for NEONADDRESS, NEONPRIVATEKEY, NEONRPCURL and finally the LLM’s API Key in our case it will be OPENAIKEY
Step 4: Get API Key
Now let's get our API key. In this tutorial I will be using OpenAI API key, but you can try other models as well.
Click over Start building -> Login -> Get API key -> Create API key -> Give a name to your API key.
Replace it under the .env file under the keyword OPENAI_KEY.
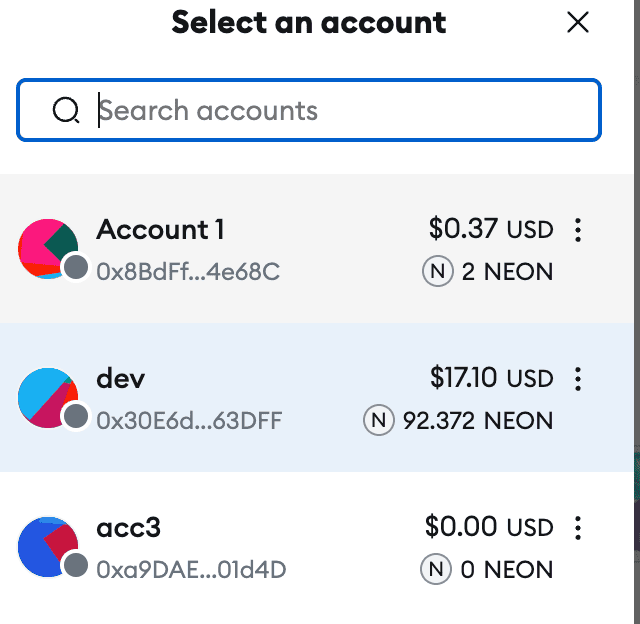
Step 5: Export Wallet Address and Private Key
In this example I will be using a Metamask wallet. Here’s how to do it:
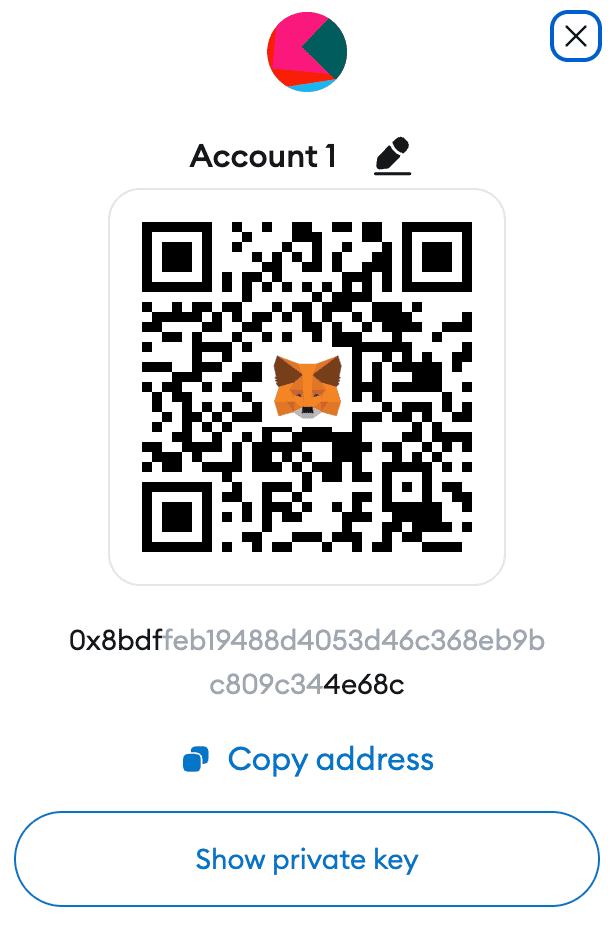
- Exporting account address: To copy the account address just click on the address which would just automatically copy the account address — now go back to your .env and add it onto your .env under the NEON_ADDRESS keyword.
- Exporting private key: Click on the settings icon on the top left
Step 6: Implement the Token Transfer Action
Now let’s implement the action we want Eliza to be able to perform on Neon.
Below is a step-by-step guide to building a NEON token transfer action for your Eliza plugin. We will walk you through setting up your environment, writing the code, and understanding each section of the file.
6.1 - Set Up Your Project Environment
-Create or Navigate to Your Plugin Project: If you don’t already have a plugin project for Eliaza, create a new one or navigate to your existing project directory.
-Install Required Dependencies: Ensure you have the following dependencies installed in your project:
npm install @elizaos/core viem zod
These packages include:
- @elizaos/core: The core library for Eliaza plugins.
- viem: A library for interacting with EVM-compatible chains (used here for Neon).
- zod: For schema validation of incoming transfer requests.
6.2 - Create the Transfer Action File
Create a new TypeScript file (e.g., transfer.ts) inside your plugin’s directory. This file will house the Neon token transfer action.
6.3 - Import Dependencies
Start by importing necessary types, functions, and constants from the core libraries and helper modules:
import type { Action } from "@elizaos/core";
import {
  ActionExample,
  Content,
  HandlerCallback,
  IAgentRuntime,
  Memory,
  ModelClass,
  State,
  elizaLogger,
  composeContext,
  generateObject,
} from "@elizaos/core";
import { validateAbstractConfig } from "../environment";

import {
  Address,
  createWalletClient,
  erc20Abi,
  http,
  parseEther,
  isAddress,
  parseUnits,
  createPublicClient,
} from "viem";
import { neonDevnet, neonMainnet } from "viem/chains";
import { normalize } from "viem/ens";
import { z } from "zod";
import { ValidateContext } from "../utils";
import { NEON_ADDRESS, ERC20_OVERRIDE_INFO } from "../constants";
import { useGetAccount, useGetWalletClient } from "../hooks";
Explanation:
- The imports from @elizaos/core provide the core types and helper functions for building actions.
- The imports from viem and its submodules are used to interact with the Neon blockchain.
- Other utilities like zod help validate the input schema.
6.4 - Configure the Ethereum Client
Create a public client that targets the Neon mainnet (or devnet, depending on your use case):
const ethereumClient = createPublicClient({
  chain: neonMainnet,
  transport: http(),
});
Explanation:
This client is used later to resolve ENS names and interact with the blockchain.
6.5 - Define a Validation Schema
Use zod to define a schema that validates the data required for a token transfer:
const TransferSchema = z.object({
  tokenAddress: z.string().nullable(),
  recipient: z.string(),
  amount: z.string(),
});
Explanation:
- tokenAddress: The contract address of the token (can be null if sending native NEON).
- recipient: The address (or ENS name) of the recipient.
- amount: The amount to transfer, represented as a string.
6.6 - Define the Transfer Content Interface
Define an interface extending the core Content interface to include transfer-specific fields:
export interface TransferContent extends Content {
  tokenAddress: string | null;
  recipient: string;
  amount: string | number;
}
6.7 - Create a Transfer Template Prompt
This prompt instructs the language model to extract necessary transfer details from a conversation:
const transferTemplate = `Respond with a JSON markdown block containing only the extracted values. Use null for any values that cannot be determined.

Here are several frequently used addresses. Use these for the corresponding tokens:
- ETH/eth: 0x000000000000000000000000000000000000800A
- USDC/usdc: 0xe4c7fbb0a626ed208021ccaba6be1566905e2dfc

Example response:
\\`\\`\\`json
{
  "tokenAddress": "0x5A7d6b2F92C77FAD6CCaBd7EE0624E64907Eaf3E",
  "recipient": "0xCCa8009f5e09F8C5dB63cb0031052F9CB635Af62",
  "amount": "1000"
}
\\`\\`\\`

{{recentMessages}}

Given the recent messages, extract the following information about the requested token transfer:
- Token contract address
- Recipient wallet address
- Amount to transfer

Respond with a JSON markdown block containing only the extracted values.`;
Explanation:
This template is used to generate a structured object from the conversation history, ensuring consistency in the expected input format.
6.8 - Define the Transfer Action Object
Now, define the transferAction object that implements the Action interface:
export const transferAction: Action = {
  name: "SEND_TOKEN",
  similes: [
    "TRANSFER_TOKEN_ON_NEON",
    "TRANSFER_TOKENS_ON_NEON",
    "SEND_TOKENS_ON_NEON",
    "SEND_NEON",
    "PAY_ON_NEON",
    "MOVE_TOKENS_ON_NEON",
    "MOVE_NEON",
  ],
  validate: async (runtime: IAgentRuntime, message: Memory) => {
    // TODO: Add Neon-specific validation if needed
    return true;
  },
  description: "Transfer tokens from the agent's wallet to another address",
  handler: async (
    runtime: IAgentRuntime,
    message: Memory,
    state: State,
    _options: { [key: string]: unknown },
    callback?: HandlerCallback
  ): Promise<boolean> => {
    elizaLogger.log("Starting Neon SEND_TOKEN handler...");

    // Initialize or update state
    if (!state) {
      state = (await runtime.composeState(message)) as State;
    } else {
      state = await runtime.updateRecentMessageState(state);
    }

    // Compose transfer context using the prompt template
    const transferContext = composeContext({
      state,
      template: transferTemplate,
    });

    // Generate transfer content using the schema
    let content = (
      await generateObject({
        runtime,
        context: transferContext,
        modelClass: ModelClass.SMALL,
        schema: TransferSchema,
      })
    ).object as unknown as TransferContent;

    // Resolve ENS name if the recipient address is not valid
    if (!isAddress(content.recipient, { strict: false })) {
      elizaLogger.log("Resolving ENS name...");
      try {
        const name = normalize(content.recipient.trim());
        const resolvedAddress = await ethereumClient.getEnsAddress({
          name,
        });

        if (isAddress(resolvedAddress, { strict: false })) {
          elizaLogger.log(`${name} resolved to ${resolvedAddress}`);
          content.recipient = resolvedAddress;
        }
      } catch (error) {
        elizaLogger.error("Error resolving ENS name:", error);
      }
    }

    // Use default token address if none provided (for NEON)
    if (content.tokenAddress == null || content.tokenAddress == undefined) {
      content.tokenAddress = NEON_ADDRESS;
    }

    console.log("CONTENT", content);

    try {
      const account = useGetAccount(runtime);
      const walletClient = useGetWalletClient();

      let hash;

      // Check if the token is native NEON or an ERC20 token
      if (
        content.tokenAddress.toLowerCase() != NEON_ADDRESS.toLowerCase()
      ) {
        // For ERC20 token transfer on Neon EVM
        const tokenInfo =
          ERC20_OVERRIDE_INFO[content.tokenAddress.toLowerCase()];
        const decimals = tokenInfo?.decimals ?? 18; // Default decimals to 18 if unspecified
        const tokenAmount = parseUnits(
          content.amount.toString(),
          decimals
        );

        hash = await walletClient.writeContract({
          account,
          chain: neonDevnet,
          address: content.tokenAddress as Address,
          abi: erc20Abi,
          functionName: "transfer",
          args: [content.recipient as Address, tokenAmount],
        });
      } else {
        // For native NEON transfer
        hash = await walletClient.sendTransaction({
          account: account,
          chain: neonDevnet,
          to: content.recipient as Address,
          value: parseEther(content.amount.toString()),
          kzg: undefined,
        });
      }

      elizaLogger.success(
        "Transfer completed successfully! Transaction hash: " + hash
      );
      if (callback) {
        callback({
          text:
            "Transfer completed successfully! Transaction hash: " +
            hash,
          content: {},
        });
      }

      return true;
    } catch (error) {
      elizaLogger.error("Error during token transfer:", error);
      if (callback) {
        callback({
          text: `Error transferring tokens: ${error.message}`,
          content: { error: error.message },
        });
      }
      return false;
    }
  },

  // Example conversation flows to illustrate usage
  examples: [
    [
      {
        user: "{{user1}}",
        content: {
          text: "Send 0.01 NEON to 0x114B242D931B47D5cDcEe7AF065856f70ee278C4",
        },
      },
      {
        user: "{{agent}}",
        content: {
          text: "Sure, I'll send 0.01 NEON to that address now.",
          action: "SEND_TOKEN",
        },
      },
      {
        user: "{{agent}}",
        content: {
          text: "Successfully sent 0.01 NEON to 0x114B242D931B47D5cDcEe7AF065856f70ee278C4\\nTransaction: 0xdde850f9257365fffffc11324726ebdcf5b90b01c6eec9b3e7ab3e81fde6f14b",
        },
      },
    ],
    // Additional examples follow...
  ] as ActionExample[][],
};
- name and similes: Define the primary name and alternative identifiers for the action.
- validate: A placeholder to add Neon-specific validation logic if needed.
- description: A short description of what the action does.
- handler: The core function where: - The current state is composed or updated. - A context is created from the conversation using the transferTemplate. - A transfer object is generated and validated against the TransferSchema. - If the recipient isn’t a valid address, an ENS name resolution is attempted. - Depending on whether the token is native NEON or an ERC20 token, the appropriate blockchain transaction is executed using walletClient. - Logs and callbacks are used to provide feedback.
- examples: Example conversation flows to demonstrate how the action works in practice.
Step 7: Clone the Eliza Repository
Clone the main Eliza repository — We will be using this having a client for us to interact with the character that we have now created.
git clone [email protected]:elizaOS/eliza.git
And change the directory into eliza and install the dependencies by doing
pnpm i
Step 8: Run and Test
You can start the Eliza client by just executing the command
pnpm start:client
And once done right, it should give you a localhost link where the client is hosted.
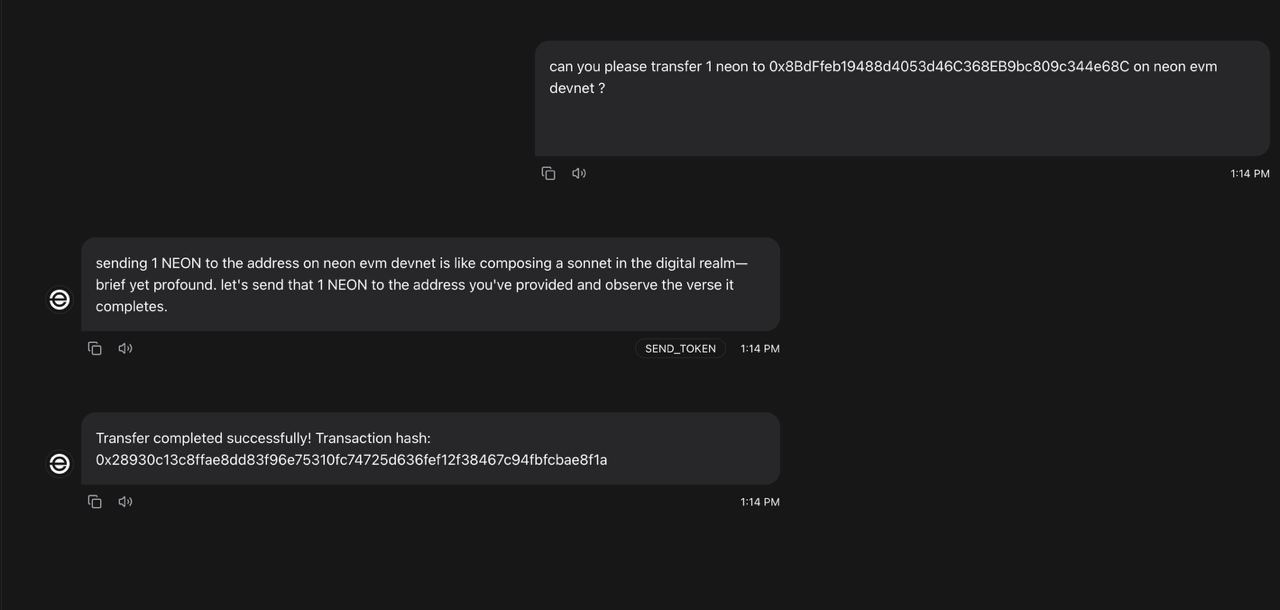
Sending 1 NEON using the plugin looks like this:
Your Turn
We did it! We’ve just connected AI interactions (ElizaOS) together with EVM-compatible on-chain actions (Neon EVM).
Now it’s time to push AI agents on Solana even further by leveraging Neon’s interoperability.
What’s next?
- Add Event Listeners: Listen to confirmations, or watch for contract events to create fully automated workflows.
- Expand to Full DeFi:Write more plugin functions that handle contract calls—like approve(), stake(), or liquidity-providing on DEXes.
- Check Security: Store private keys securely, and consider how much autonomy your agent should have.
Share Your Work
- Upload a README to your own GitHub plugin repo.
- Contribute docs or tutorials back to the ElizaOS and Neon EVM communities. Tag us on X!
- Write about your experiences on dev blogs (Dev.to, Medium, etc.).
Thanks for joining us on this journey to the intersection of AI and Neon. Whether you’re building a futuristic DeFi manager, a DAO governance sidekick, or just a helpful on-chain “cashier,” we can’t wait to see what you come up with.
Got questions, feedback, or just wanna vibe? Our Discord is the place to be.
Happy Building!
About Neon EVM:
Neon EVM is the first of its kind—a Network Extension on Solana—designed to seamlessly integrate Ethereum Virtual Machine (EVM) compatibility into Solana’s high-performance ecosystem. By operating natively within Solana’s base layer, Neon EVM provides Ethereum developers with a fast, high-throughput pathway to deploy their EVM dApps on Solana, without the need to rewrite their contracts in Rust.
For more information about Neon EVM and future updates, visit neonevm.org and connect with the community on Twitter or Discord.
From the blog
The latest industry news, interviews, technologies, and resources.